
Learn Clay Modeling with us today!
If you love clay modeling and like to involve your kids too, then this is one clay modeling project you must try with your kids. I am sure you will enjoy as much as we did...
Well last afternoon, my daughter and I, were, as usual, getting bored. It was a hot summer afternoon and we had already finished watching our quota of movies for the weekend and we had nothing better to do than to get ourselves involved in some creative task. Nothing better than clay modeling we thought. So we took out our clay and clay modeling tools - we used kiddy clay (plasticine clay) and believe me its the best since we can keep reusing it again and again without any qualms or trouble. And yes, we have been using this same batch of clay since the last couple of years.
 |
| Clay Modeling a Palm Tree |
Material required:
For making the Palm tree, you will need following colors of clay:
Brown for the tree trunk
Green for the Palm leaves
Yellow for the coconut
Later we also added some tuft of grass and some flowers, so you will also need:
Red for some flowers, and some more green clay for the grass tuft.
Procedure:
The steps are not so difficult so keep a close watch at the pictures and you will definitely find it easy to carry on the clay modeling project.
I. Making of the Palm Tree Trunk
Step 01: Firstly roll out the brown clay using a roller and flatten it as you go up and down.
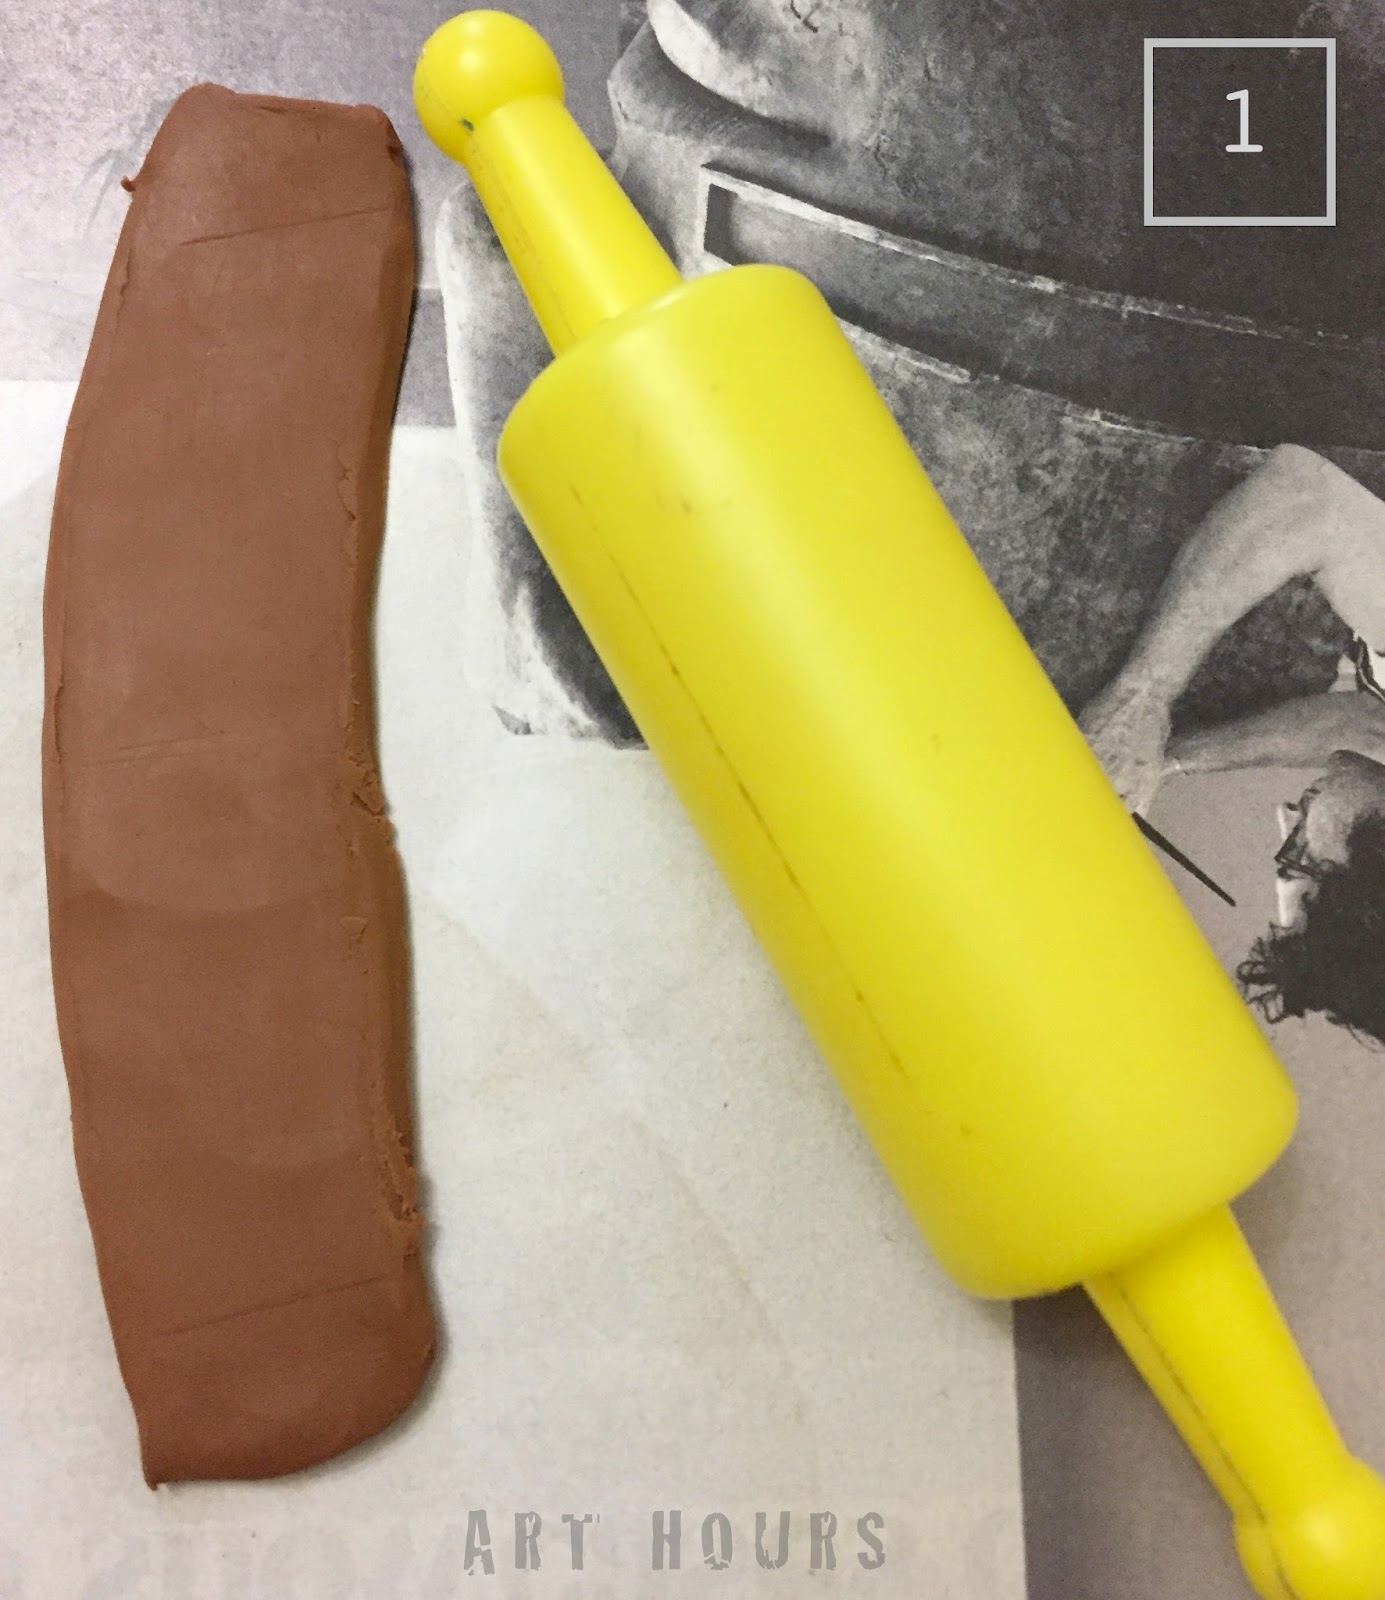 |
| Step 01: Rolling out the clay to flatten it |
Step 02: Use a plastic knife or any sharp instrument to draw the outlines of the palm tree trunk.
 |
| Step 02: Draw the shape of the trunk |
Step 03: We used the same plastic knife tool to cut out the extra clay and carved out the palm tree trunk.
 |
| Step 03: Carving out the trunk shape |
Step 04: Thereafter, using a toothpick we added the textures to the trunk.
 |
| Step 04: Adding textures with toothpick |
II. Making of the palm frond/leaves
Step 05: Take a green colored clay ball, roll it out to flatten it. Then draw the shape of the leaves and cut it out as shown in the picture below. Remove any excess clay from the sides and shape the palm frond/leaf with your fingers.
 |
| Step 05: Carving out the clay leaves |
Step 06: Add textures using a tooth-pick or any sharp tool.
 |
| Step 06: Adding textures to the clay leaf |
III. Making of the coconuts
Step07: The palm tree is incomplete without its fruit. So what we do is use a yellow color clay to make some coconuts. Take a small ball of yellow clay and make it oval shaped. Then flatten it with your fingers. Thereafter add some textures using the toothpick
 |
| Step 07: Make the coconut fruits using yellow clay |
IV. Assembling the palm tree:
Step 08: You will need to make 4-5 leaves and 3 coconuts. Once they are ready you can begin to assemble them.
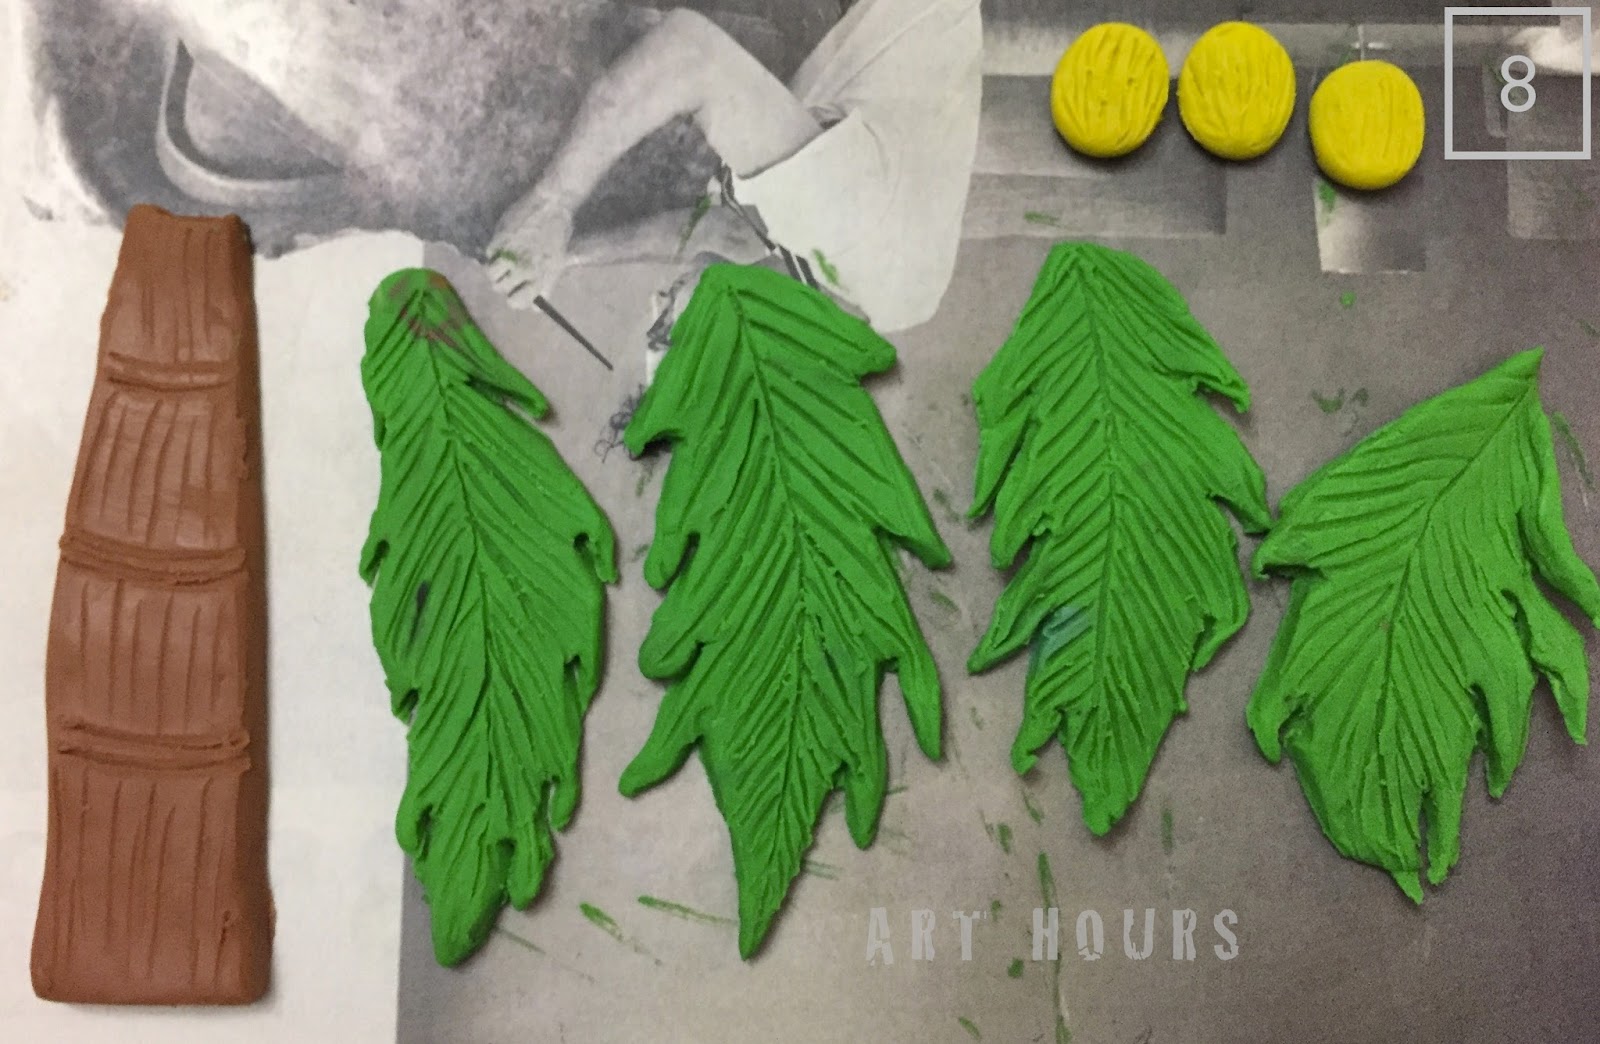 |
| Step 08: The tree trunk, leaves, and coconuts ready to be assembled |
Step 09: Place the coconuts first on the palm tree trunk and then place the leaves one by one overlapping each other as shown below.
 |
| Step 09: Assembling the fruits and the leaves |
Step 10: The picture below shows the arrangement of the leaves and the fruits. The palm tree is complete but we can still add some more details. So keep scrolling down. There is more to follow.
 |
| Step 10: The palm tree is complete |
V. Adding the grass tuft and flowers:
Step 11: We added a tuft of grass with some flowers below the tree trunk and here's how we did it. We took some green clay and flattened it out with a roller.
 |
| Step 11: Green clay for grass |
Step 12: Next we drew the grass outlines on the green clay and cut it out with the plastic knife.
 |
| Step 12: Grass outlines on the clay |
 |
| Step 12b: Cutting out the grass tuft |
Step 13: Next, we took some red clay for the flowers and using a toothpick we added the textures to the flower and the green stems later.
 |
| Step 13: Red clay for flowers and green for stems |
Note: I don't have the pictures of the textures we added to the grass tuft and to the flowers but you can see it the final picture below.
Step 14: The final step is just adding the tuft of grass with the flowers. We just placed the green tuft of grass covering the palm trunk at the bottom and we added a couple of red clay flowers. And done...we have a beautiful clay palm tree with a grass tuft and red flowers.
 |
| Clay Palm Tree with a grass tuft and red flowers |
Was it easy? I don't know if it's going to be easy for you all but we had fun making this palm tree with the grass tuft and the flowers. It was like painting but the medium we used was clay. Do give it a try and let us know.
Here's a quick snapshot of the entire clay palm tree making procedure on our youtube channel.
Hope this tutorial was helpful.
Have a good day!
---
No comments:
Post a Comment