29 Jan 2017

Origami Heart Box - To Fit or Not into a Box

Have heard it somewhere that Some people will only love you as long as you fit in their box. Don't be afraid to disappoint. Have been thinking about this quote for quite a long time now. Do we really need to please everyone? Do we need to live for others? Do we have the right to question as a woman or as a human being? Or are we just required to follow the norms, perform our duties, carry on our responsibilities and always try to fit into somebody else's box otherwise we are considered as misfits in this society! 

If we dare to disappoint then we are selfish. If we dare to question we are deemed wrong. What then is right and what is wrong...have been reflecting, questioning and wondering for quite some time now yet I don't have the answer to this question. I will leave you then to decide...if you figure it out then leave your comments. 


As I leave you wondering and wandering into the realms of boxes, about fits and misfits, here is what I folded today...a Heart Box designed by Jo Nakashima and a Standing Heart designed by Klaus-Dieter Ennen.

A Heart Box and a Standing Heart
In the above picture, the Heart Box is made using 17.5 x 17.5 cm square origami paper, while the Standing Heart is made from a 6.5 x 6.5 cm square origami paper.

And yes, these two things are beautiful ideas you can try and make for your loved ones this Valentine's day...if you wish to fit into somebody's heart you can surely try making something special!
---

25 Jan 2017

Paper Collages from Paper Scraps: Easy DIY Ideas


Have loads of paper scrap and don't know what to do. Throw them away...no...here are some creative ideas to help you use these very paper scraps to make something beautiful...some artwork from scraps and they indeed look beautiful.
EAsy DIY by ART Hours

We have loads of these colored printer paper wastes that were leftover from our previous art & craft classes, workshops and more...we never throw away things easily..call it being thrifty or whatever...but there have been times when these paper scraps have helped us create beautiful things in the past. As you scroll down below you will see many examples, which were made by us during some boring afternoon, when we had nothing better to do!

What you see in the picture below is just a glimpse...we have a big carton full of these paper scraps.
Paper Scraps
Here, is what we tried one afternoon, using the above paper scraps that were leftover after we cut out small flowers using a craft paper punch.

Flower with a butterfly from Paper scraps
For the above example of the Flower with the butterfly, we tore the paper scraps and shaped them with our hands only, no scissors or any other tools were used. After cutting out the desired shapes we simply glued them onto an A5 size card paper so that we could use it as a greeting card. 


A Bee and a Flower from paper scraps
In the above example, we have used colored printer paper wastes combined with newspaper scraps too. For this, we used a pair of scissors to cut out every element from the paper scraps and then glued these shapes onto a paper.


A Girl and a Rose from paper scraps
For the Girl and the rose in the above example, we tore out paper strips from the paper scraps we had and didn't use any other tool. The rose was just created by tearing out the paper...Purely an artwork with hands!


Paper Collage of Mowgli and Shanti from paper scraps
For the above paper collage of Mowgli and Shanti, we roughly sketched out the outlines of Mowgli and Shanti with the pitcher in hand. Thereafter, we tore out pieces from the paper scraps and glued them following the pencil outline, adding on details like the shrub, sky etc. later.


A Peacock from paper scraps
For peacock above, we drew the shape on the paper scraps, then cut them out with a pair of scissors. We started with the peacock's body in the center, and thereafter added the double layer of feathers. You will also spot a small earthworm near the peacock's legs!


A Tree from paper scraps
For the tree, we cut out the trunk from a newspaper and then glued on paper strips of different colors for the tree's foliage.

These paper collages can be used as greeting cards or posters, or you can just frame them and hang them on the walls.

Hope the above examples, help you in some way or the other, to make use of paper scraps instead of throwing them away. It's a small attempt from our side to reuse and recycle paper and hope it serves as an inspiration to create things from paper wastes or scraps.

Do leave your comments, ideas or suggestions and share these ideas with your friends.

Thank you for stopping by...

---

22 Jan 2017

3D Tessellation with Cubes - A Picture Tutorial


We all know what is Tessellation...in simple words, it is the repetition of a pattern so that there are no overlaps or gaps. If you like pencil shading and geometry, then this is one exercise you will love doing. And yes, it is a great way to combine Arts with Maths!

Here's a step by step picture tutorial showing how to make a simple 3D Tessellation pattern with cubes, using just a paper and a pencil.
3D Tessellation with Cubes

Things you need:
Paper, Pencil, Ruler, Eraser

Tutorial :

Step 01: 
Start by making a grid...in the example below, the grid is of 2cm x 2cm. Use a ruler and pencil to mark the sheet, starting from one edge to another in both horizontal and vertical direction. You can use a set square instead of a ruler or simply make the markings at 2cm intervals all along the horizontal and vertical lines starting from the left side of the paper.  Once the markings are made connect them with a 2H or HB pencil.
Step 01: Make an even grid all across the paper.
Step 02:
Make squares by joining the points of the grid as shown the figure below.
Make squares by joining the points on the grids
Step 03
Now, complete the shape of the cubes by connecting the vertices of the squares. Join the vertices only in the vertical direction as shown in the figure below.
Step 03: Join the vertices of the squares in vertical direction
Step 04:
Once the overall pattern with the cubes is complete, begin the pencil shading work. Start by shading only the left side of the cube as shown. The left side of the cube will be shaded in a light tone. I used a HB pencil for shading the left side.
Step 04: Shade only the left side of the cubes
Step 05:
Once all the left side of the cubes are shaded, complete the cubes by shading the right side, but this time with a darker tone. I used a 2B pencil for the darker tone.
Step 05: Shading the cube sides
Step 06:
Remove all the unnecessary pencil grid lines made in the earlier steps using an eraser. You can remove them before you begin shading the cubes. At this stage, for removing unnecessary pencil lines, you can take the help of an erasing shield.

Step 06: Erase the unnecessary pencil lines
Done:
The 3D Tessellation with cubes is now complete.
3D Tessellation with cubes - pencil shading
Let me know if the tutorial was helpful. 

Thankyou for visiting this page.

18 Jan 2017

Calligraphy and Watercolors: Some Experiments

Since, the last few days, I have been experimenting a little with calligraphy and watercolors - both demanding an equal amount of patience and love. Patience because you cannot achieve good calligraphy skills in a day - it requires a lot of practice and, love for the art form because if you don't love something you will not give your 100% to it. Similarly, though the results of watercolors look beautiful, it is not such an easy medium to deal with, especially when you combine it with calligraphy. Nevertheless, it is worth giving it a try. 
Calligraphy and Watercolors - Some Experiments

Generally, calligraphy with watercolors is done using a paintbrush only to transfer the watercolors onto the pen nib, and it is with the nib that you finally do the lettering work. However, I wanted to try calligraphy with the paint brush itself, hence the task became all the more difficult - call it the Art Hours way. Also, it has always been the Art Hours mission to do things differently, to try new things and explore further so it had to be the paintbrush instead of the nib.

For my experiment of calligraphy with watercolors, I have used a zero number paintbrush for calligraphy. Sometimes I have just used a single color, while sometimes I have tried using a combination of two colors. I have worked on an A5 size printer paper which is again not an ideal medium to use for watercolors since it bleeds more when you use watercolors. I would suggest using a better quality of paper to work with especially when you are using watercolors.

 Experiments with Watercolors and Calligraphy

Here, are the result of the experiments, I tried while combining calligraphy and watercolors, from the first to last in the order I attempted them. 

 "You're the Best" in Black  

"Enjoy the little things" in Black

"Thank you" in Black

"Thank you" in Red and yellow

"Thank you" in Black

"Grow Love" in Red

"You Deserve Love" in Blue and Green
Since there is nobody better than yourself to judge your work, I am my own judge and critic. So, full marks go to the thought and idea, but the result was not something great or outstanding...

Lesson learned: Need to practice more...there's a lot of scope for improvement.

You always learn from mistakes...at least it motivates me to do better!

If you try this technique do leave your comments below. 

---

16 Jan 2017

Zentangle and Watercolors: An Experiment with LInes and Patterns!


I generally don't spend more than half an hour on my drawings or sketches, but Zentangling takes away a lot of your time and needs immense focus and patience. Inspired by various Zentangle artists, I thought let me try my hand at Zentangling, but I couldn't resist myself from drawing straight lines and patterns - call it the strange habits of an Architect!

In the example below, I have used shades of green and yellow on different grids that I made with a pencil. I have first applied a wash of watercolors, waited for it to dry for about an hour and then used a water based black marker for the Zentangle work. It is just recently that I have started experimenting with Zentangling and the example below is not a very good piece of Zentangle work, nevertheless, it was fun experimenting. I would rather call it an experiment with geometry and watercolors.

Applied a wash of Water-colors on every grid

It's All Geometry!
Does it look anything like Zentangling? Nopes...looks like fun with Geometry...

Maybe Zentangle Artists would understand better!

---

11 Jan 2017

Dressing the Doll: Origami Dress Tutorial

Origami Paper Dress
Last evening, I was playing with my daughter when she said she wanted to dress her dolls in some new attire. I made a paper dress for her doll. Seeing the cute paper dress she uttered a big 'wow' and began to play with it. Encouraged by her response, I decided to make some more pieces. 

Quickly, I rummaged through the big stack of newspapers and magazines, sorted out some colored sheets and cut them into squares. Within a few minutes, I was ready with some more dresses. 

We made a dress of almost every color of the rainbow, wrapped it around the doll and fixed the dress onto the doll's body using an elastic band. My eight-year-old daughter was occupied and kept herself amused for an hour after that playing with the dresses, dressing and undressing the doll with the different paper dresses - some for the morning wear, some for the evening wear, some for the party and so on...

Each of the dresses turned out so pretty, that I couldn't stop myself from posting them here.

Materials used: 12cm x 12cm Square Magazine paper

Origami Dresses of all colors
The Doll in her original dress
Yellow Origami Dress 
Red Origami Dress

Green Dress 
This last white one is our favorite, for we added a small quilled red rose at the center of the dress.
White Dress with Rose
Here's the tutorial to make the origami dress. You can try making one too. 

Tutorial:
For the tutorial, I have used a yellow color magazine paper of size of about 10cm x 10cm.

Material used: Magazine paper, 10cmx10cm

Step 01: Start by folding the paper it into half in the vertical direction. Note the crease. Its mountain fold on the yellow side. If you are using one side colored sheet then you must start keeping the white side on top and fold it into half. So you will see a mountain crease on the colored side.
Step 01: Fold into half vertically

Step 02: Keeping the white side on top, fold in the two sides to meet at centre.
Step 02: Fold in two sides to meet at centre
This is how it would look with the yellow side facing on the top. The paper has been divided into 4 equal parts vertically.
The paper has 4 equal vertical divisions.

Step 03: Note the black hidden lines made on the two sides for valley folds.
Step 03: Note the hidden lines for the next fold
Fold in the two sides one by one along the hidden lines to meet at the centre. 
Fold in the right side to touch at centre.
This is how it would look once both the sides meet at centre.
Folding in the two sides

Step 04: Now note the next two horizontal lines marked on the paper for making a step fold.
Note the lines for making the step fold
 This is how it would look after making the step fold.
Make the step fold

Step 05: Now pull out the sides of the dress and crease well and flatten them. Also at the top, make small triangular folds for the collar.
Step 05: Pull out the sides of the dress and fold the collars

Step 06: Turn over. Now fold in the top and squash fold the triangles.
Step 06: Fold in the top sides and squash them

Step 07: Fold in the two sides along the small triangles made at the top, along with the bottom sides of the dress and crease well.

Step 07: Fold in the sides as shown

Step 08: Fold out the sleeves as shown.
Step 08: Fold out the sleeves as shown

Step 09: Turn over and the paper dress is ready.
Turn over and Done

Do try making these cute origami dresses. I am sure you will have as much fun as we did. 

Am trying to make some small paper houses too for my kid..will try to post it soon...till then Happy folding!
---

8 Jan 2017

Some Cartoon faces: Pencil Sketches

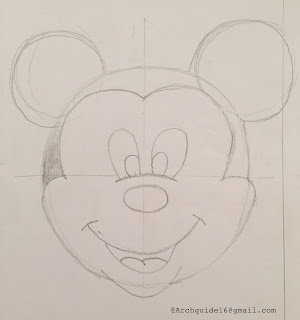
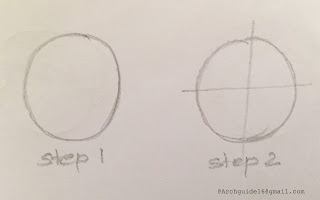
This month our sketching class is focused on learning to draw cartoons. As I was teaching my little students the basics of the cartoon sketching, they were very keen to draw different Disney Cartoon characters on the first day itself. I didn't want to discourage them by saying that it will be difficult to make a start with and that too on the first day itself. So based on popular choice, I put a quick sketch of the Mickey Mouse face in front of them and asked them to attempt it step by step. The little kids realized it was not so easy and they were stuck at the very first step itself. So I had to draw a circle for them with a grid in the center and then I asked them to proceed. 
Rough Sketch of Mickey Mouse
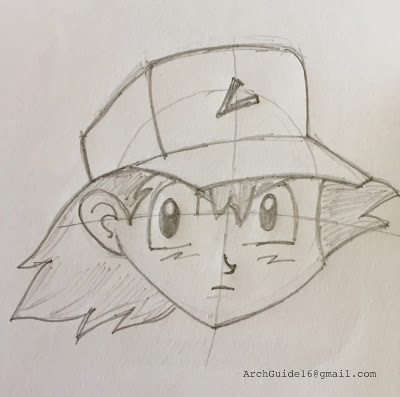
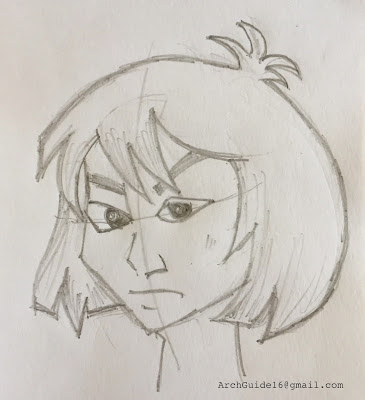
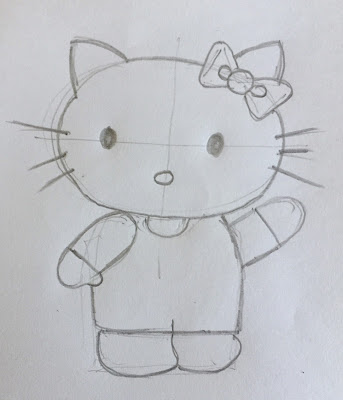
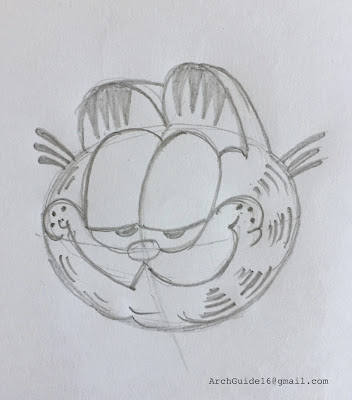
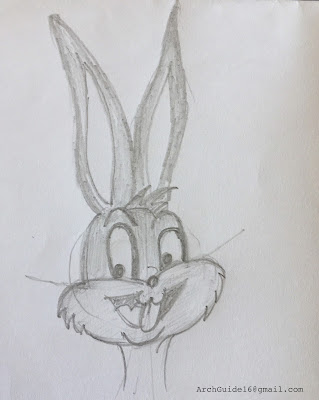
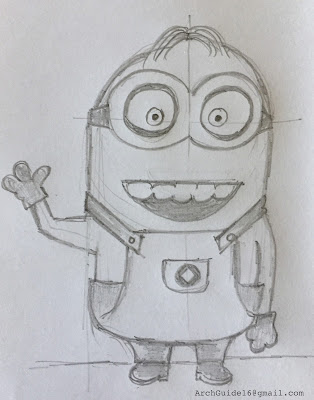
The next day, I thought if the kids wish to draw some cartoons I should put a few examples in front of them, just as a starting point or reference. Hence, I got down with my pencil and sketchpad and made a few rough sketches of the following cartoons: Ben 10, Chota Bheem, Ash Ketchum, Garfield, Bugs Bunny and so on...

Generally, when I sketch a cartoon face, I prefer to start by making a circle with a horizontal and vertical grid that acts a reference point to place the eyes. Next follows the placement of the other details like the nose, mouth, hairs etc. step by step. 
Beginning of a Cartoon Face - The Art Hours Way!
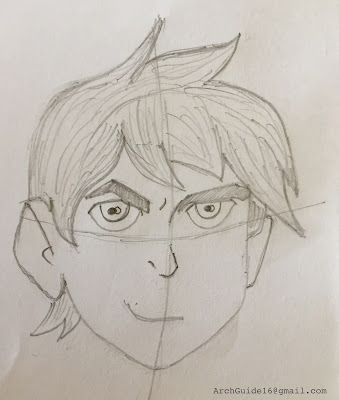
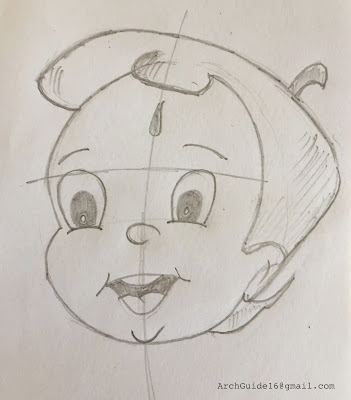
Here, are some Cartoon faces I sketched last week. They are drawn using a simple HB pencil with minimal lines. For every sketch that I drew I used a rough circle with a grid to start with, and then added the details like eyes, hair, etc. You will notice in every sketch below, I have not erased the reference grid lines that served as the starting point.
Ben 10 
Chota Bheem
Ash Ketchum from Pokemon series 
Mowgli from the Jungle Book
Hello Kitty
Garfield 
Bugs Bunny 
Minion
All these are rough sketches and surely they have ample scope for improvement. All I wished to convey through this post is that sketching cartoons is not so difficult. However, every line has a meaning, and a little change in the position of a line, placement of the details, scale, and proportion, can impact your sketch in a great way. Hence, observe and practice. 

Keep learning and exploring the Art Hours way!

Till then Happy Cartooning.
---