13 Feb 2018

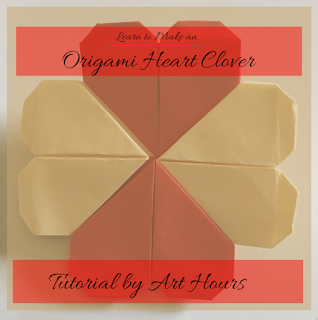
Learn to make Origami Heart Clover for decoration this Valentine


Looking for last minute ideas for Handmade gifts or decorations for this Valentine's?
You have landed on the right page...Through this post today, you will learn to fold an origami Heart Clover that you can use to make decorations for cards, gift toppers and more...

Tutorial by Art Hours


Category: Modular Origami
Level of difficulty: On a scale of 5,  I would give it a 3.
Heart Clover Origami

Below is a picture tutorial, followed by a written step by step explanation, that will guide you to make this model.

Material used:
8.75cm x 8.75cm square sheets cut out from the printer paper. Requires 4 such square units. You can use any square sized sheets depending upon the requirement.

Procedure:
Steps to follow as per the picture above for making the Clover unit. 
If you are using a two-sided different colored paper, start with white side on the top and proceed with the instructions in the same way.

Heart Clover Unit 

Instructions to make the Heart Clover Unit:
  1. Fold in half along the centers to make the horizontal and vertical creases and then open it. Note the hidden lines for the fold in the next step.
  2. Fold in as shown.
  3. Turn over and note the hidden lines for the next fold.
  4. Fold along the hidden lines to meet at the centre.
  5. Turn over and note the hidden lines to make the next fold.
  6. Fold along the hidden lines.
  7. Now focus on the upper part of the unit. Squash open the folds and fold as shown.
  8. Note the hidden lines for the next fold.
  9. Fold in both the sides along the hidden lines to meet at the centre.
  10. Fold in the top triangles along the indicated hidden lines.
  11. Turn over and one heart unit is ready.
Tutorial by Art Hours
Heart Clover Model Assembly

Instructions to assemble the model:
  1. Follow the instructions above and make a total of 4 units.
  2. Insert units one by one, below each other as shown in the picture above and glue them. The heart clover model is ready.

You can use this origami model to make greeting cards or decorate the gifts by using them as gift toppers and gift them to your dear and near ones this Valentine's season. Your friends will love receiving gifts made by hand and if it is such a pretty thing, your efforts will surely be appreciated.

Hope this tutorial inspires you to make many such beautiful origami models.

Thank you for stopping by.

Have a nice day ahead and... yes...wishing you all a very Happy Valentine's Day. 
Keep folding and spreading peace and love.

---

7 Feb 2018

Origami Tutorial: Sonobe unit and a glimpse into Sonobe Variations


The last few months have been a great journey while we explored the world of 3D and modular origami. In the process, we discovered beautiful models designed by several origami artists around the world. Most popular is, of course, the Sonobe model. On digging out the internet we found that their origin is still unknown. Two of the possible creators could be Toshie Takohama and Mitsunobu Sonobe, who have published several books together and are members of the Origami Group. 

The beauty of the Sonobe unit lies in its flexibility to combine in several different combinations that can be used to build a simple triangular bipyramid, cube, trisoctahedron to many complicated polyhedrons. Origami artists around the world have experimented with this basic unit and have built several variations using the same unit. 

Here's a picture tutorial you can follow to make a Sonobe unit.
Art Hours
Sonobe Unit: Picture Tutorial by Art Hours

The model made of three units results in a triangular bipyramid. Using six units results in a cube. Using twelve Sonobe units, results in a triakis octahedron.  Using 30 units you can make a triakis icosahedron. 

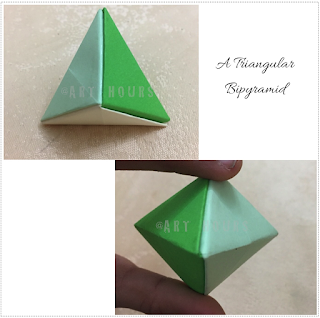
Here's a picture of a bipyramid (also called a dipyramid) that was built using 3 Sonobe units. Only 3 units were used to build the bipyramid which has 6 triangular faces and hence can also be called a hexahedron.
tutorial by art hours
A Triangular Bipyramid using 3 sonobe units

Below is a picture of a cube that was built using 6 nos. of Sonobe units. This one has six square faces as visible in the picture.
tutorial by art hours
Origami Cube using 6 Sonobe units

We found several models of the Sonobe on the internet and had fun building models from different types of variations. Below is a picture of a Trisoctahedron we built using 12 units of the Sonobe unit but its a slightly different variation of the Sonobe unit. The shape that resulted is actually an octahedron with triangular pyramids added on its every face. So, it has 8 extreme ends or tips and each tip has 3 triangular faces. Totally, it has 24 triangular faces.

We used magazine paper to build the model...one way of putting magazine paper to good use instead of throwing them away, and after all, recycling is the buzzword nowadays!

Trisoctahedron made from 12 units - variation of Sonobe unit

Here are two more models using the same variation of Sonobe unit used above for the trisoctahedron. The cube was made using 6 units and the Triambic Icosahedron was made using 30 units.

Left Front: Cube using 6 units
Right Back: Triambic Icosahedron using 30 units

We tried out several other variations too. Below is something splendid we tried using other variations developed by Maria Sinayskaya. She calls it the Rose Kusudama. You will find the model diagrams on her website. By the way kusudama is a Japanese word which means medicine balls (kusuri means medicine and tama means a ball in Japanese). They were used for incense and potpourri; nowadays typically used as decorations or gifts.

The first model you see in the picture below is a yellow rose kusudama, made from 12 nos. of 1:2 rectangular sheets. The second model is a pink rose kusudama, made from 12 nos. square sheets. Personally, I loved the second model, as it turns out to be a sturdy one. 

Rose Kusudama using 12 nos. 1:2 Rectangular sheet

Rose Kusudama using 12 nos. Square sheet

We are still exploring many other origami models and designing our own variations too.

Our journey is Origami is getting interesting day by day...keep visiting us more often to learn and explore the art world. 

Stay with us, learn, like and share. Your valuable comments and feedback are welcome.

Follow us on Instagram to explore what we are working on currently: www.instagram.com/archguide16 or stop by our FB page:fb.me/arthours to explore our tutorials and student workshops.

Thank you for stopping by.

Have a good day...
---