23 Aug 2020

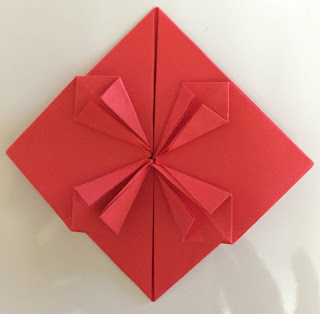
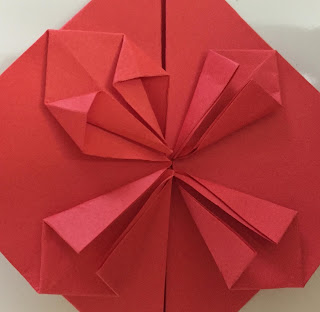
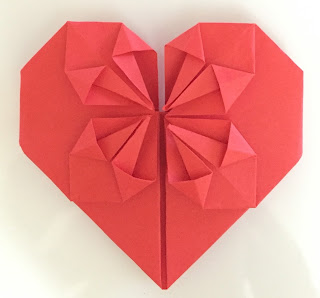
Ganesha Origami


Vakratunda mahakaya suryakoti samaprabha
Nirvignam kuru me deva sarva karyasu sarvada.

Meaning:
O God, with a curved trunk and a massive body, whose brilliance is equal to millions of suns, please make all my endeavors free of obstacles, always.

It's August and the ten day festival of Ganesh Chaturthi has begun. Ganesh, also known as Ganapati or Vinayak, is known to be remover of obstacles. The festival of Ganesh Chaturthi brings with it a lot of childhood memories for me. The festival is a grand celebration lasting for ten days, with pandals decorated elaborately, the bhajans and the aartis, the prasad thereafter and all the fun and merriment with friends and family members. Ganesh is believed to bring good luck and fortune and is worshipped before beginning any new task.

Origami Ganesha

It has been several years, though we Bengalis do not celebrate Ganesh Chaturthi festival, I do make small idols of Ganesha with my daughter, make some sweets for offering to Ganesha. This time the activity was restricted to paper folding. As I was folding the paper, many thoughts came to my mind. But above of all I prayed to Ganesha to bring back our good times, free from Covid virus and make the world a better place to live in. Thus, I prayed...

Hey Ganesha give me the strength to move forward,
Show me the way when I am lost, 
Give the wisdom to figure out the meaning of life,
Bless me with true love.

Hey Gajanan, guide me when life is challenging,
Always be by my side to seek the truth,
Help me to make a difference in this world, 
Protect me from all the evil.

Om Ganeshaya Namah...

If you wish to learn how to make an origami Ganesha, do visit my blogpost for the tutorial that I have posted earlier. Here is the link to the tutorial.

Thank you for stopping by. Have a nice day.


-----


6 Aug 2020

Recycle a plastic bottle for planting


The lockdown period due to Covid 19, has turned out to be very fruitful for all those who wished to learn something new but never had the time to do it. It has made us realize that life has many facets and each one has to be lived with, whether you like it or not, you can't run away from it. 

So while we are trying to make maximum utilization of our time, we are also learning the importance of the environment. We are trying to value our time, interacting and spending more time with our family members.

Just as we try to deal with the pandemic, slowly trying to move ahead with our lives, here's a small tutorial on reusing and recycling a plastic bottle for planting saplings. 

"1...2...3...Let's plant a tree"...that's our slogan for the activity today.

"1,2,3...Lets plant a tree"


Materials required:
  1. Plastic bottle (any juice bottle or bottled water container).
  2. Sapling of your choice
  3. Fertilized soil for filling up the container

As shown in the picture below, we planted a marigold sapling in a small plastic juice bottle. We cut out the bottom part of the bottle, filled it up with fertilized soil and got a sapling from our neighborhood to be planted in the container. We also made small holes (say around 3-4) at the bottom of the bottle to allow excess water to drain out from the bottom.

Recycled plastic bottle for planting a sapling
Materials required to decorate the plastic bottle:

  1. paper cuttings
  2. white glue 
  3. water colors/poster colors
  4. brushes
As shown in the picture below, first we stuck paper all over the bottle surface using white glue. 

Paper mache over the plastic bottle
Then we painted the entire bottle with shades of red, orange and yellow as shown below in the picture. 


Recycled plastic bottle for planting

Hope you also try innovative ways to use and recycle plastic wastes and do something about reducing carbon footprints rather than just sitting and complaining.

Hope you find our tutorial useful. Thank you for stopping by...


21 Mar 2020

Learn to draw a hair braid

Learning to draw a hair braid?
Follow the post till the end and you find it is not so difficult at all.

Here's a simple pencil sketch for kids, beginners or anyone who is keen to learn the art of pencil sketching. This sketching was done by my 11-year-old daughter who loves sketching with pencil and insists on using pencil nowadays more than color pencils. So while she was struggling to make this sketch, I clicked the pictures of the steps as she proceeded with the sketch and made a picture tutorial for all you with tips for improving the sketch. 

Hair Braid Pencil Sketch

Materials required:
HB pencil, 2B pencil, paper, eraser

Procedure:

Step 01:
Start with the rough outline of the braid, using an HB pencil.
Step 01: Draw Braid outline
Step 02:
Using the same HB pencil, draw the interlocking braid pattern as shown below.

Step 02:  Interlocking braid pattern
 Step 03:
Continue the pattern as you go downwards. Make sure the pattern becomes thinner as you go downwards as the braid becomes narrower towards the end.

Step 03: Continue the interlocking pattern downwards
Step 04:
Now, using a HB pencil only start hatching the braid. Start with a downwards stroke following the curves.

Step 04: Start hatching with HB pencil

Step 05:
Now, using a 2B pencil darken the top and bottom strokes, to accentuate the pattern.

Step 05: Darken the strokes using 2B pencil
Step 06:
Notice, that the mid part is left grey. Use an HB pencil to soften the strokes. You can fill up the middles part which looks white with a very light shade of grey using an HB pencil.
Step 06: Leave the mid parts white or fill up with light grey using HB pencil
Step 07:
Now the final step is to add some loose strands to make the braid look more realistic. Use HB pencil to make the loose strands.
Step 07: Add loose strands
Finally, the braid is done. Observe the sketches of the hair braid below. The long one looks incomplete, with strokes not evenly made. The second one of the left has made over-use of hatches, making it dense and it has lost the realistic effect. The third one on the bottom is closer to the effect we wish to achieve. Clear hatches and pencil strokes, with the 3D effect we wish to achieve.

Hair Braids 

Tip:

  • Use a well-sharpened pencil to make clear strokes. Keep sharpening them if the lead of the pencil becomes blunt in between.
  • Try cross-hatching to make it more realistic.


The picture below shows the final result we wish to achieve with cross-hatching.
Hair Braid Pencil Sketch

Happy sketching. Have a nice day ahead and stay safe.

-----
20 Mar 2020

Easy Origami Bookmarks for Kids


While we are stuck indoors due to this pandemic called Coronavirus, we practice social distancing and keep ourselves safe at home, how can we make our kids involved in more productive ways...that's the question of the hour.

So the answer is different for everyone...while some would like their kids to play indoors, we at home need to follow a disciplined life even during this time. Begin your day with exercise, follow a healthy routine even when you are at home.

For kids who are finding it difficult to find ways to keep themselves from boredom, here's an easy origami tutorial for all you kids to be occupied with some craft activity.

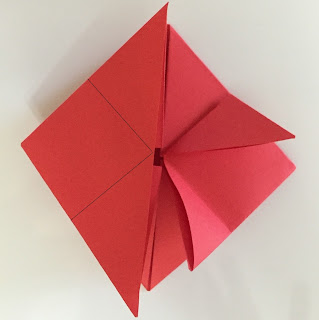
Here's a short picture tutorial for an origami bookmark. This tutorial was created by my daughter so all you need to do is just follow the steps, make something useful and make productive use of your time.

Origami Bookmark


Material required:

  • For origami: Square sheet of paper
  • For decoration: black marker, glue, white paper cutouts, glue


Procedure:

Step 01: 
Start by making a diagonal crease at the center as shown in the picture below.
Step 01: Make a diagonal crease
Step 02:
Fold along the diagonal crease to form a triangular shape.
Step 02: Fold along the diagonal crease

Step 03:
Take the tip of the triangle paper and fold it up to meet the other tip (it should form a perfect mini triangle)
Step 03: Fold the paper up to meet the top tip

Step 04:
Fold the other half of the paper just like the other side (when both sides are folded it should look like a square)
Step 04: Fold the other tip up 

Step 05:
Open the folds and make sure that when opened it looks like the picture given below.
Step 05: Open the folds

Step 06:
Take the top flap and fold it down as shown below
Step 06: Fold the tip down

Step 07:
Now, fold the two sides again following the crease made earlier.
Step 07: Fold sides up


Step 08:
Insert the two flaps one by one into the pocket made as shown below.
Step 08: Insert small triangle tip inside pocket


Step 09:
Fold the other small triangle tip into the pocket (when finished it should look like the picture given below).

Step 09: Fold the other triangle into the pocket


Step 10: 
And Done...
Now you can decorate the bookmark to look like a cute animal of your choice and add small paper features to it, or you can draw a pattern of your choice on it for decoration. 


And yes after the entire exercise don't forget to wash your hands clean from all the glue or pen marks you would have gathered on your hands.

I hope you also enjoy making this animal bookmark and keep yourself safe while we all fight the pandemic together.

Have a good day.


14 Feb 2020

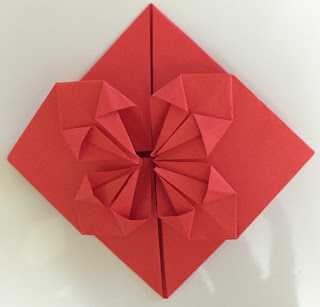
Learn to make Origami Blossom Heart in 12 Steps


The most important thing in life is to learn how to give love out and to let it in...With this thought let us all welcome all the love and learn to live harmoniously with each other...

Origami tutorial for blossom hearts


This tutorial contains 12 steps to make the origami heart with clear instructions and pictures to help you understand clearly.


Material Required : 
  • Origami sheet or craft paper
For this tutorial, the size of the paper used is 21.0 cm x 10.5 cm rectangular sheet.

Steps for making the origami blossom heart

Step 01 :
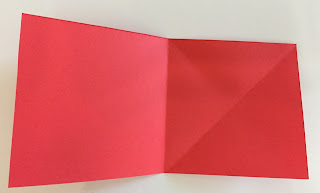
Take the rectangular sheet, fold in half vertically. You can see the crease in the center of the picture below.

arthoursdesignstudio
01 -  Fold the sheet into half
Step 02 :
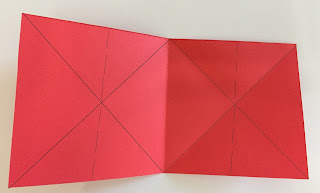
You have two squares. Take the first half and make diagonal mountain folds as shown below.
arthoursdesignstudio
02 - Make diagonal mountain folds on each part of the squares

Repeat the same in the other half of the square sheet as well.

Step 03 :
Make a vertical crease or valley fold at the center of each square.

arthoursdesignstudio
03 - Make vertical valley folds as indicated by dotted lines on each of the squares

Step 04 :
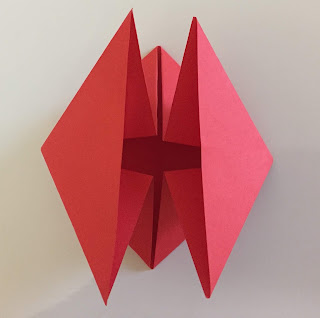
Then follow the creases squash fold it to get double triangular bases.

arthoursdesignstudio
04a - Follow the creases to squash fold it further

arthoursdesignstudio
04b - Squash fold to get two triangular bases 

Step 05:
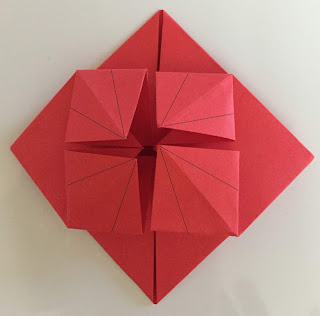
Note the lines made on one of the triangular flaps. Fold the flaps as shown in the picture below.


arthoursdesignstudio
05a - Fold the flaps upwards

Step 06 :
Open the triangles one by one and squash fold one by one to get mini squares as shown below.
arthoursdesignstudio
06 - Squash fold to get squares on each flap

Repeat the squash fold on every flap to get four mini squares as shown below.
06a - Squash fold to get mini squares on each flap

Step 07 :
Fold the flaps following the lines indicated on each square flaps.

arthoursdesignstudio
07a - Note the lines on each flap for making the next folds

After making the folds this is how it should look like.

arthoursdesignstudio
07b - Follow the lines to make the folds as shown in the picture

Step 08 :
Open flaps and squash fold each of them. 

arthoursdesignstudio
08a - Open each flap and squash the tips as shown
 Repeat this step on each of the flaps.
arthoursdesignstudio
08b - Open the flaps and squash fold the tips on each of the flaps

Step 09 :
Turn over
arthoursdesignstudio
09 - Turn over

Step 10 :
Fold in the triangular part backward. 

arthoursdesignstudio
10 - Fold up the flap as shown

Step 11 :
Fold in the two edges as shown and you can see the heart taking its shape.
arthoursdesignstudio
11 - Fold in the two edges 
Step 12 : 
All you need to do is flip over the entire assembly and the blossom heart is ready.
arthoursdesignstudio
12 - Flip over

You can place a star/bead/button in the center to make it look more pretty.
arthoursdesignstudio
Place decoration of your choice

Tips for use:
You can use this beautiful origami for gift toppers, decorating cards or simply as a bookmark.

Make one today and gift it to your loved ones. Keep spreading the love...

Have a nice day. 

And Happy Origaming!