The most important thing in life is to learn how to give love out and to let it in...With this thought let us all welcome all the love and learn to live harmoniously with each other...
This tutorial contains 12 steps to make the origami heart with clear instructions and pictures to help you understand clearly.
Material Required :
- Origami sheet or craft paper
For this tutorial, the size of the paper used is 21.0 cm x 10.5 cm rectangular sheet.
Steps for making the origami blossom heart
Step 01 :
Take the rectangular sheet, fold in half vertically. You can see the crease in the center of the picture below.
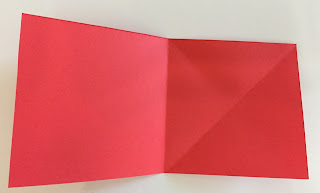 |
| 01 - Fold the sheet into half |
Step 02 :
You have two squares. Take the first half and make diagonal mountain folds as shown below.
 |
| 02 - Make diagonal mountain folds on each part of the squares |
Repeat the same in the other half of the square sheet as well.
Step 03 :
Make a vertical crease or valley fold at the center of each square.
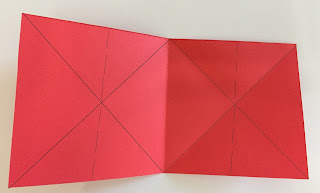 |
| 03 - Make vertical valley folds as indicated by dotted lines on each of the squares |
Step 04 :
Then follow the creases squash fold it to get double triangular bases.
 |
| 04a - Follow the creases to squash fold it further |
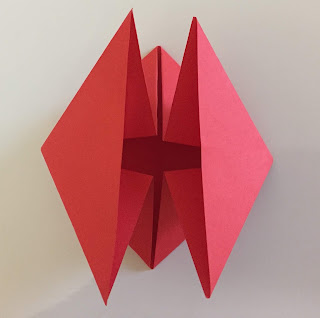 |
| 04b - Squash fold to get two triangular bases |
Step 05:
Note the lines made on one of the triangular flaps. Fold the flaps as shown in the picture below.
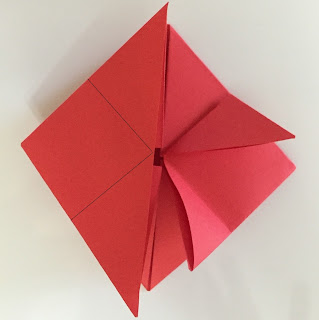 |
| 05a - Fold the flaps upwards |
Step 06 :
Open the triangles one by one and squash fold one by one to get mini squares as shown below.
 |
| 06 - Squash fold to get squares on each flap |
Repeat the squash fold on every flap to get four mini squares as shown below.
 |
| 06a - Squash fold to get mini squares on each flap |
Step 07 :
Fold the flaps following the lines indicated on each square flaps.
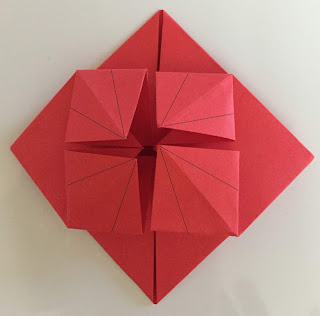 |
| 07a - Note the lines on each flap for making the next folds |
After making the folds this is how it should look like.
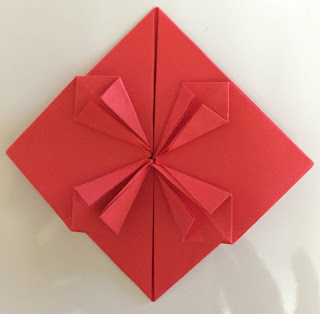 |
| 07b - Follow the lines to make the folds as shown in the picture |
Step 08 :
Open flaps and squash fold each of them.
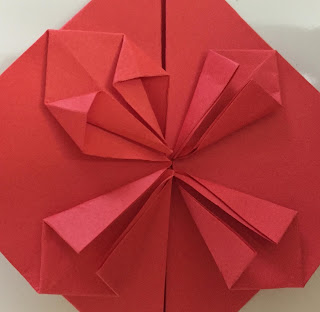 |
| 08a - Open each flap and squash the tips as shown |
Repeat this step on each of the flaps.
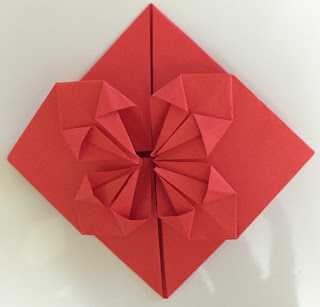 |
| 08b - Open the flaps and squash fold the tips on each of the flaps |
Step 09 :
Turn over
 |
| 09 - Turn over |
Step 10 :
Fold in the triangular part backward.
 |
| 10 - Fold up the flap as shown |
Step 11 :
Fold in the two edges as shown and you can see the heart taking its shape.
 |
| 11 - Fold in the two edges |
Step 12 :
All you need to do is flip over the entire assembly and the blossom heart is ready.
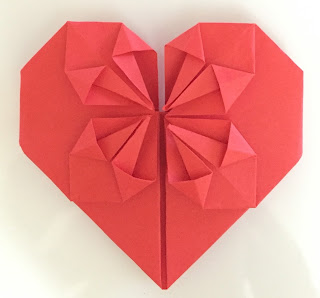 |
| 12 - Flip over |
You can place a star/bead/button in the center to make it look more pretty.
 |
| Place decoration of your choice |
Tips for use:
You can use this beautiful origami for gift toppers, decorating cards or simply as a bookmark.
Make one today and gift it to your loved ones. Keep spreading the love...
Have a nice day.
And Happy Origaming!


No comments:
Post a Comment