Just a couple of days ago, I posted a tutorial on how to use paper strips scraps to make a floral decoration. You can view the link here to view how we made the paper hearts. Making the heart units is a fun activity for the kids and keeps them involved up to a certain stage.
Left with lots of paper scraps from our previous workshop we decided to use them for some craft activity. In the previous tutorial, we made simple hearts using two similar sized stripes. To make it interesting we used two different colors to make the heart unit. While in this tutorial, we made hearts using two different sized paper strips with two different color combinations as shown in the picture below.
 |
| Left Inset: The heart unit formed using similar sized paper strips Right Inset: The heart unit formed using different sized paper strips |
This tutorial begins in a similar manner but the end result is different and much simpler for kids to try with minimum guidance from parents. The following tutorial includes step by step guidance to make the decoration along with pictures to make it easier for kids to follow.
Tutorial:
We used paper strips that were left over from our previous craft activities. You can cut them as per your requirement or follow the steps below. We had strips of two different lengths, to form the double loop. We joined the two loops to make a heart shape. Once, the heart shapes were done, we joined every heart unit using glue or stapled them together.
Materials used: Paper strips, scissors, stapler, glue.
Paper size used for outer loop: 6" x 1"
Paper size used for inner loop: 4" x 1"
Step 1: Make the inner loop using the 4"x1" paper strip by applying glue at the edges.
 |
| Step 1: The inner loop using the smaller sized strip |
Step 2: Using the longer sized strip, make another loop by gluing it to the outer edges of smaller loop.
 |
| Step 2: The outer loop glued to the inner paper loop |
Step 3: Make two units using two different colored paper strips as shown below.
 |
| Step 3: Paper loops using two different colored paper strips |
Step 4: Now apply glue to the inner edges of the two looped units, and join them to form a heart shape.
 |
| Step 4: The heart unit formed by sticking two looped units together |
Step 5: Make many such heart units using the above steps.
 |
| Step 5: Many heart units formed using the above steps |
Step 6: Staple two units as shown in the picture below. You can also use glue instead of a stapler to join them.
 |
| Step 6: Join the units using stapler or glue |
Done: Join all the units together using staples or glue to form the heart decoration.
 |
| Done: All the units are joined to form the heart decoration |
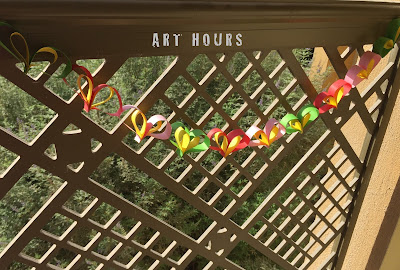
Once done we were looking for places to use the decoration. We placed it in all the locations including the entrance door, the balcony railing, etc. We also used it as a garland around a soft toy. Finally, it ended up as a decoration for the toy house.
 |
| Decoration at the entrance door |
 |
| Decoration on the balcony railing |
 |
| Garland around the soft toy |
 |
| Finally found the place to decorate the toy house |
Suggestion or tips for use:
This heart decoration can be used for decoration during parties or other events, or also as decoration in your kid's room. Since, its an easy DIY paper craft activity for kids, you can involve your kids to make this decoration for their birthday celebration too; involvement of kids for decoration during their own birthday celebration will not only make them happy but they will also realize the efforts we adults take to celebrate their birthdays.
---

No comments:
Post a Comment