23 Feb 2017

First Anniversary for our Blog - Clay Flowers Tutorial

Today, we complete one year of blogging with Art Hours, our FB page. The aim of this blog was to train and guide students and beginners in different arts and crafts forms. During this last one year, we have had a stream of students coming and going, we conducted workshops for students, ladies and corporate staff too. All in all, as we taught we also learned. Hope this journey of ours continues for a long time successfully. So, as we complete our 1st blog anniversary, here's a small tutorial we thought we should share with all you readers and art enthusiasts today.
1st Blog Anniversary

It was an easy exercise done with my 8-year-old kid today. So even if the picture above looks all pretty, it was not a very difficult exercise at all.

Materials used:
Super light air dry clay, Colors used: Red and Green
Advantages: It is really very very light but sticky on hands. So what we did is apply talcum powder on our palms before we started using it.

Tools required: 
Toothpick or a sharp tool for making the indentations. Toothpick is also required for making the stem's body.

Procedure to make the Clay Flower:

Step 01:
For the red flower, we simply started with small balls of clay and flattened them between our palms. We started from the center and added one layer of petals after the other. Thereafter, we inserted a toothpick from the bottom side of the clay flower to make the stem and add the leaves.

Step 02:
For the stem, we have inserted the toothpick as mentioned in the last step. Next, we took a lump of green clay and rolled it around the toothpick covering it completely. Once the stem is covered with the green clay, we added the leaves.

Step 03:
For the leaves again, we took a small lump of green clay, flattened it between our palms. Then using a toothpick we made some indentations to add the details for the leaf. We added 2-3 leaves under the flower.

Step 04: 
Last but not the least, leave it to dry. We have kept it for drying it naturally, hoping that it will dry within the next 48 hours.
01 - Super Air Dry Red Color Clay
02 - Super Air Dry Green Color Clay
As you see in the picture above, all we needed for making these beautiful clay flowers was the clay itself and toothpick. Try it out in your homes too. It's an easy DIY project and doesn't need many tools. We plan to make more such tiny flowers for gifting purpose.

Do visit us our FB page for more details on our students' activities, art and craft workshops, and other events. And here's the link to our FB page: fb.me/arthours.

Let us know if you found our tutorials helpful. Your feedback helps us to learn and grow further.

Please keep liking and sharing our posts. Thank you for visiting us and liking our posts. 

21 Feb 2017

Origami Double Pyramids - Infinite Possibilities

Little did I know that my search for making something useful using origami techniques would end up so beautifully. I came across this origami double pyramids as I stumbled upon some 3D origami wall decor ideas. Now, at first sight, I thought it would be very difficult and time-consuming, but on the contrary, as I searched for a tutorial on how to make it, I was surprised to discover that it was actually much easier to make and wouldn't take much time also. So this is what I tried today and I thought I should share it with all before I try doing further with this beautiful Origami Double Pyramids.

It turns out that this double pyramid has many uses. It can be used as mobile phone holder or as a card holder very conveniently. A simple DIY craft and a very useful one too. Moreover, the folds are not very complicated and also it doesn't require any glue. Just use a thick square paper and it will be easier to maintain the pyramid shape.

Material specifications:
Colored Card stock paper, 180 GSM.
Size: 20x20 cm 


Origami Double Pyramids - Phone Holder


Also, once you are done with these double pyramids, there are infinite possibilities to use it as a wall decor. 
Origami Double Pyramids - Wall decor DIY

I enjoyed making them and am planning to make a 3D wall decor using the above units. So go ahead and give it a try.

You can find the instructions to make it on instructables.com. 

16 Feb 2017

Crafting this Valentine Season - Heart Hours at Art Hours!


Heart Hours @ Art Hours
Art Hours celebrated this Valentine Season doing various art and crafts activities with the students.

Our activities include Drawing, Painting, Origami, Clay Modeling, Calligraphy and more...This post is dedicated to all the art and craft work related with this Valentine Season.

Before I begin to elaborate on the activities we did, let Art Hours wish you all readers a very Happy Valentine's Day (belated wishes). Do you know why Valentine's Day is celebrated? Well, the reason or the roots behind the Valentine Day is not very clear...there are many stories that revolve around the day. Some say it was celebrated to honor a St. Valentine who was martyred on 14th Feb, while some say it was declared by Chaucer to celebrate it as a mating season of the birds and since then it has been celebrated as a day associated with romance. Whatever the reason maybe, today it has certainly become a commercial success and is celebrated all around the world with the exchange of gifts, cards, flowers and more...
Valentine's Day Wishes

Coming back to Art Hours Art and Craft activities this Valentine Season, let us first present to you all the origami work we explored.

It was fun as we discovered different variations of the origami heart models designed by origami artists around the world. Some required square sheets, while some required rectangular sheets. Also, some models were made using just a single sheet while some required the use of multiple sheets. All were fun to make, and here's what we tried.

All the origami models that you see below are unique and each of them was made from a single sheet. It didn't involve any cutting of paper or glue. Model-1 is a simple heart insert that can be used to decorate a gift box. Model-2 is Clover Heart frame, what you see is the clovers' side, while the back side is a photo frame that can be made to stand by lifting one of the heart flaps as you see in the picture. Model-3 which is two hearts of different colors was made from a single sheet. Designed by Francis Ow, the dual colored heart was a surprise indeed. Model-5 and 7 are different variations of the dual colored heart. Model-6 is a heart insert that can be used as gift topper or as a bookmark too.
1 - An Origami Square Box with a Heart insert
2 - Clover Heart frame
3 - Two Hearts
4 - Heart Stand
5 - Dual colored Heart
6 - Heart Insert
7 - Dual colored Heart - variation

Below, are some Traditional Origami Heart models and its different variations. Very often, I post tutorials on this blog and recently I posted one on the winged heart as you see in the picture below. It was a recent post and it didn't take long to make. Here's a link on how to make the winged heart and how to hide secret messages in its compartments. Just click here to view the tutorial. 

1 - Heart with a crane
2 - Winged Heart
3 - Standing Heart 01
4 - Standing Heart 02
5 - Heart insert
5a - Heart insert
6 - Dual colored Heart - Variation 1
7 - Dual colored Heart - Variation 2
8 - Easy Heart model

The next on our list below are the Origami Roses; we made some on the request of a client and some just for fun. All of them were single sheet models, except for model-4, which is a magic rose box and is modular origami involving the use of 6 units. Model-1 shows some red and pink quilled roses complete with a calyx, leaf, and stem. Model-2 is a jeweled origami rose, which didn't come out the way it should, but it was a challenge folding it.
1 - Quilled origami roses
2- Jeweled origami rose
3 - Twisted roses
4 - Magic rose box
1 - Quilled origami rose
2 - Origami rose - Kawasaki rose variation

From our Students' portfolio, we have some Calligraphy and Origami work below. Made by kids in the age group of 8-9 year old, the students are learning both calligraphy and origami, and it was an exercise they loved doing since it combined both the above-mentioned skills. So based on the valentine theme for friends, Art Hours students tried their hand at Calligraphy using simple Mid Schooler style fonts to send out a beautiful message this Valentine Season; "True Friends are like a candle burning in the dark." and they learned to make an origami easy heart and a candle too.

Students' work - From the calligraphy & origami section 

From the Students' Drawing section for kids in the age group of 6-8, the exercise was to explore with the heart shape. We got some interesting drawings by the kids from this age group.
Drawing with Hearts -
A mouse, a flower, a princess, a house 
Drawing with Hearts -
A caterpillar, a cat face, a fish

Drawing with Hearts -
A Flamingo pair, Butterfly, Umbrella

From our Clay modeling section we did make a lot of clay hearts, clay Diya and more...Here is a link to the tutorial for making clay heart pendant or clay trinkets using air dry clay. I had posted a tutorial earlier this month, you can check it out here.

Clay Heart Trinkets

Hope you enjoyed the glimpse at the 'Heart Hours' at Art Hours and I hope the links to the tutorials attached are helpful.

Do come and join us...we do a lot of art and craft activities every week at - The Gardens, Dubai. To know more about our activities you can click on this link here.

Give this post a like if you liked this blog post, and do share this with your friends, for sharing is loving and caring!
---

15 Feb 2017

Matisse and African Art: Art Inspiration for this Month

"Creativity takes courage." Henri Matisse
Truly, to be creative, to do something different, you needn't bother about what your friends will think or say, or whether your teacher would appreciate or not. Do not be restrict your creativity to other people's whims or wishes. You create what you wish to create, what you think is right, what you feel is beautiful. You work hard and don't be afraid to fail. This is what I told my students before I introduced the artist of the month. They were a little surprised since this was something different than what we usually start with on other days.

Creativity takes Courage - Henri Matisse
Collage by Art Hours

I was searching for inspirational ideas from some popular artists work to show to my students and I came across the works of the great Henri Matisse - the French painter from the 20th Century and a rival of Pablo Picasso. His paintings were colorful innovations that were considered important for the French movement of Fauvism and laid the foundation for expressive and decorative paintings. Though still life and the nude remained his favorite subjects, towards the end of his life he made important contributions to collages with a series of works using cut-out shapes of color. This is what got me more interested in his work. However, before we proceed in that area here are some key features of his art that we all need to understand.
  • His work was influenced by art from other cultures and he had incorporated the decorative qualities of Islamic Art, the angularity of African sculptures and flatness of Japanese prints into his own style. 
  • His use of color and pattern is often deliberately disorienting and unsettling.
  • He used pure colors and white of exposed canvas to create a light filled atmosphere of his Fauve paintings.
Some of his important paintings include: 
Harmony in red, The joy of life, Woman with a hat, Green stripe, The open window and more...

As I said earlier, what interested me more was Henri Matisse's painting with scissors. In the late 1940s, Henri Matisse turned to cut paper - a radical innovation which involved cutting out painted sheets into various shapes and sizes - from vegetal to abstract - which he then arranged into lively compositions. 

Here, are some work by Art Hours students that we made inspired by Henri Matisse and some inspired by African art also. Henri Matisse was inspired by North African masks and sculptures, while we at Art Hours dared to differ a bit by referring to African prints instead. Hence, our work that you below, was both an inspiration from Henri Matisse's works and African prints.

Painting on A5 size paper, inspired by African Prints

Why introduce Henri Matisse and African prints together to the kids?
Well, the session was an extended session on patterns that we were doing one week, but the kids seemed disinterested and less motivated to draw patterns. African prints seemed to be an interesting way to understand patterns, shapes and use of colors. Also, Henri Matisse paintings are difficult to interpret and understand by kids who belong in the age group of 8-10. But his cut-outs are beautiful works and serve as a great inspiration to the kids who wish to explore with shapes. You will also notice that the African prints are mostly geometric patterns and Henri Matisse cut-outs are free forms and shapes. So this exercise turned out great in a way that combined simple geometric patterns with free shapes and forms.

Have a look at what we did at Art Hours inspired by the artist Henri Matisse...

Art inspired by African prints
"Life" - as titled by our student
"The Enemies" - as titled by our student
'Colors of Life' - as titled by our student
'Mixed up earth' - as titled by our student
'Little Joys of Life' - A paper Collage inspired by Henri Matisse cutouts
For more about Henri Matisse and his work,  you can visit the sources mentioned below.


Sources referred:
henrimatisse.org
theartstory.org
moma.org


-----

12 Feb 2017

Origami Winged Heart with a Secret Message

Valentine's day is not just to exhibit love to your friends only...make it a day to show and acknowledge love to your dear and near ones as well; it could be your mother, father, your husband or wife or to your kids as well. 

I have planned this Valentine day to surprise my daughter with a winged heart and a secret message inside. And here's how I plan to do it. I am going to decorate her morning cup of milk with a just a small heart insert and a small winged heart with a secret message inside. Hope she likes it...keeping my fingers crossed...

Origami Winged Heart with a morning cup of milk

Here's the tutorial below on how to make an origami winged heart and how to use it to hide a secret message inside it.


TUTORIAL FOR AN ORIGAMI WINGED HEART

MATERIALS REQUIRED
Origami paper (here size used is 7.5cm x 7.5 cm),
Any small paper to write the secret message


PROCEDURE

Step 01: 
Start with a dual sided colored paper with white side on the top. Make creases in the center of the paper both in the horizontal and vertical direction. 

Step 01
Step 02: 
Fold the top and bottom sides to meet at center.
Step 02
Step 03: 
Turn it over.
Step 03
Step 04: 
Note the crease made for the next fold
Step 04
 Fold the bottom to meet at the center
Step 04 (contd.)
Step 05:
Turn over to fold down the top edge in the next step.
Step 05
Step 06:
Fold down about 1/3rd the top edge as shown in the picture below and squash the centers to get the tiny triangles at the top.
Step 06
Step 07:
Fold down the extreme left and right sides as shown below.

Step 07
Step 08: 
Now focus back to the top. Fold in the small triangles you see on both the sides to shape the heart.
Step 08
Step 09:
Turn over and the winged heart is ready.
Step 09

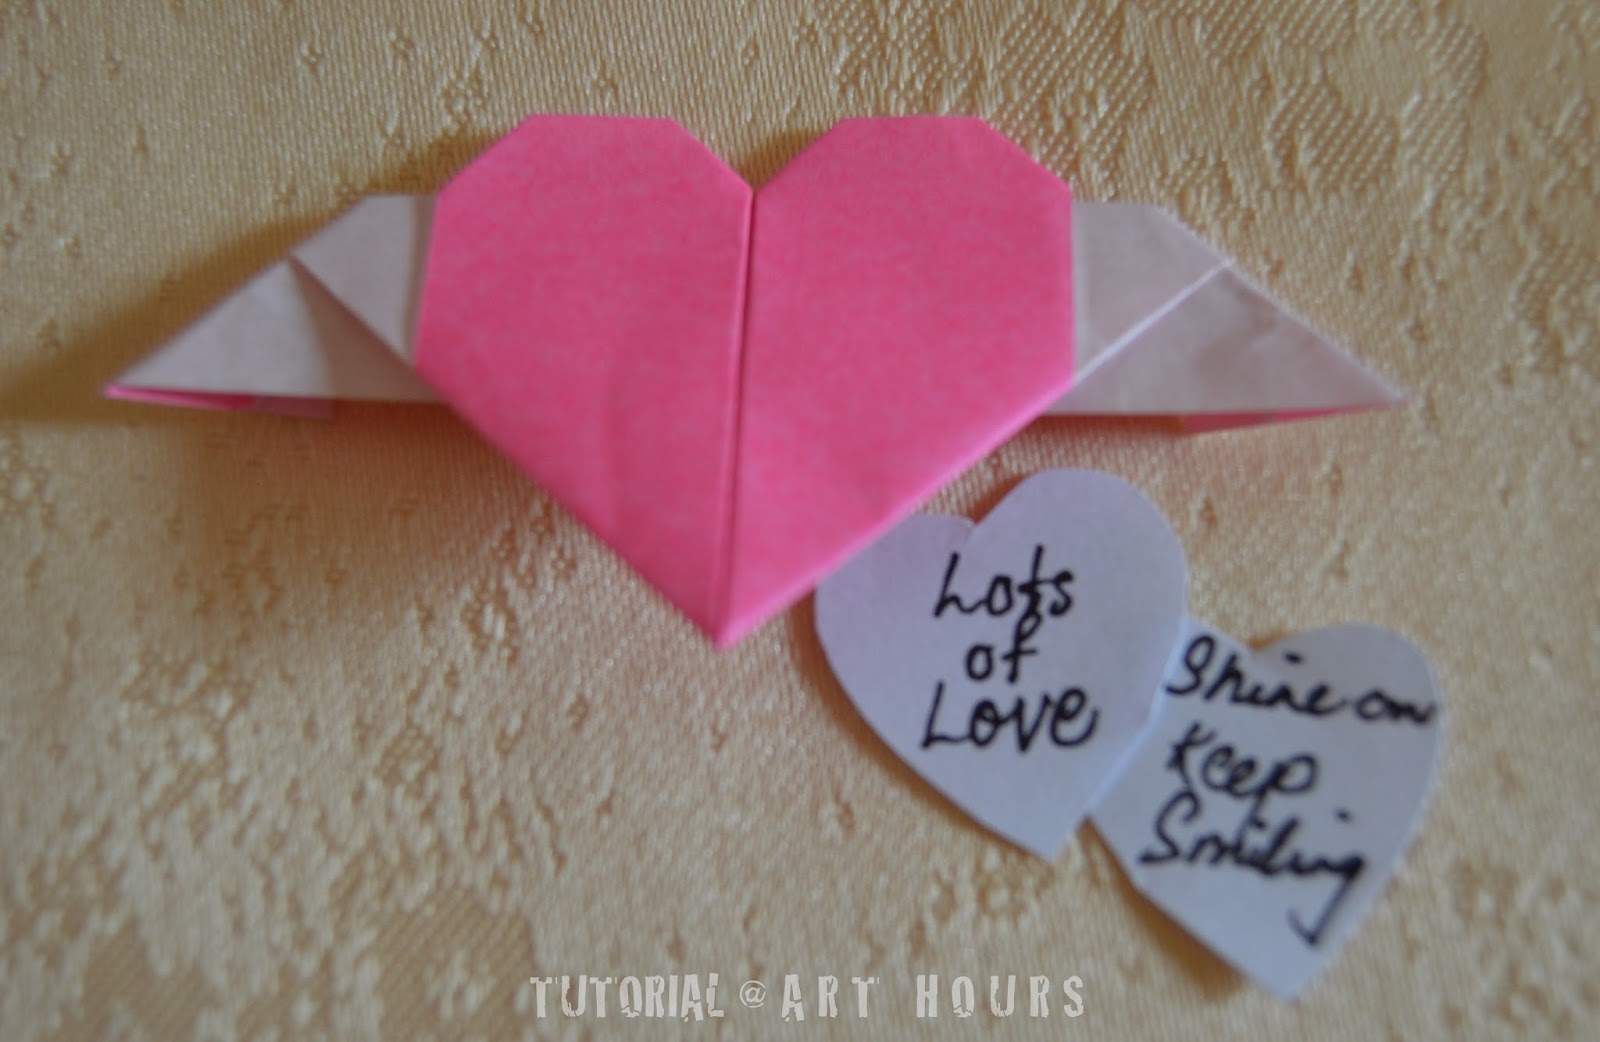
Now lets deal with the secret message and the compartments to hide the messages in. Cut out two hearts as shown below and write down the intended message. The heart cutouts should be small enough to fit in the small compartments of the origami winged heart.
Heart cutouts with secret messages

There is one compartment on the front side and another compartment on the back side of the winged heart. As shown in the picture below, you can slide in the heart with a message on the front side of the origami winged heart.
Front compartment to hide a secret message 

Turn over the winged heart. Lift up the top flap and there is another compartment on the back side too to slide in another secret message.
Lift the top flap to reveal another compartment to hide a message

I enjoyed this entire exercise of making this origami winged heart, writing down the messages and then hiding them in the secret compartments. It didn't take more than 15 minutes to do the entire exercise.

Kids usually love surprises, especially when they find some secret compartments or pockets. 

Try it out and surprise your kid and shower him/her with love always and not just on this day. Kids need a lot more of love, affection, and affirmation from us adults than what we show or acknowledge in our daily lives. So don't miss any opportunity to shower and spread love this season.


Sources referred:
I got this beautiful tutorial from jenuinemom.com, a lovely website that provides lots of DIYs and craft tutorials.
---

8 Feb 2017

Clay Trinkets Tutorial: Useful Valentine DIY

This Valentine season we, at Art Hours, have tried many different crafts and amongst them is making clay trinkets. We used air dry clay for these little trinkets. It is a craft activity that kids can try by themselves with little adult supervision; leave them with clay and you will see your little kids being occupied with clay for hours together. This activity was done by my 8-year old kid with great ease. For making these trinkets you don't need sophisticated tools or equipment. As a matter of fact, we just used whatever toys we found around the house. 

Clay Heart Trinket


Materials required:
  • Air Dry Clay (any brand will do) - We used Fimo Air Dry Clay.
  • Cookie cutters or plastic clay moulds to cut out different shapes
  • Toothpicks to make holes and/or add surface texture
  • Simple tools like sketch pen caps, or other toy tools to add surface texture - get creative here
  • Paints - Acrylic paints or poster colors will also do
  • Strings or ribbons to pass through the trinkets

Procedure to make the Clay Trinkets:

Step 01 - Shaping the Clay Trinkets:
We started by rolling out a ball of clay of about 2" in diameter, flattened it by a rolling pin and then used different cutters for the required shapes. We used cookie cutters for the hearts and the flower. The size of the heart trinkets are about 3.5 cm and the flower trinkets are about 3.0 cm. The thickness of all the clay trinkets is around 0.5 cm. We didn't make them very thick since we planned to use these trinkets as lockets or charms, so they had to be light weight. The picture that you see below are of the wet clay trinkets after we added surface textures.
Art Hours Tutorial
Wet Clay Trinkets

Step 02 - Adding Surface Textures
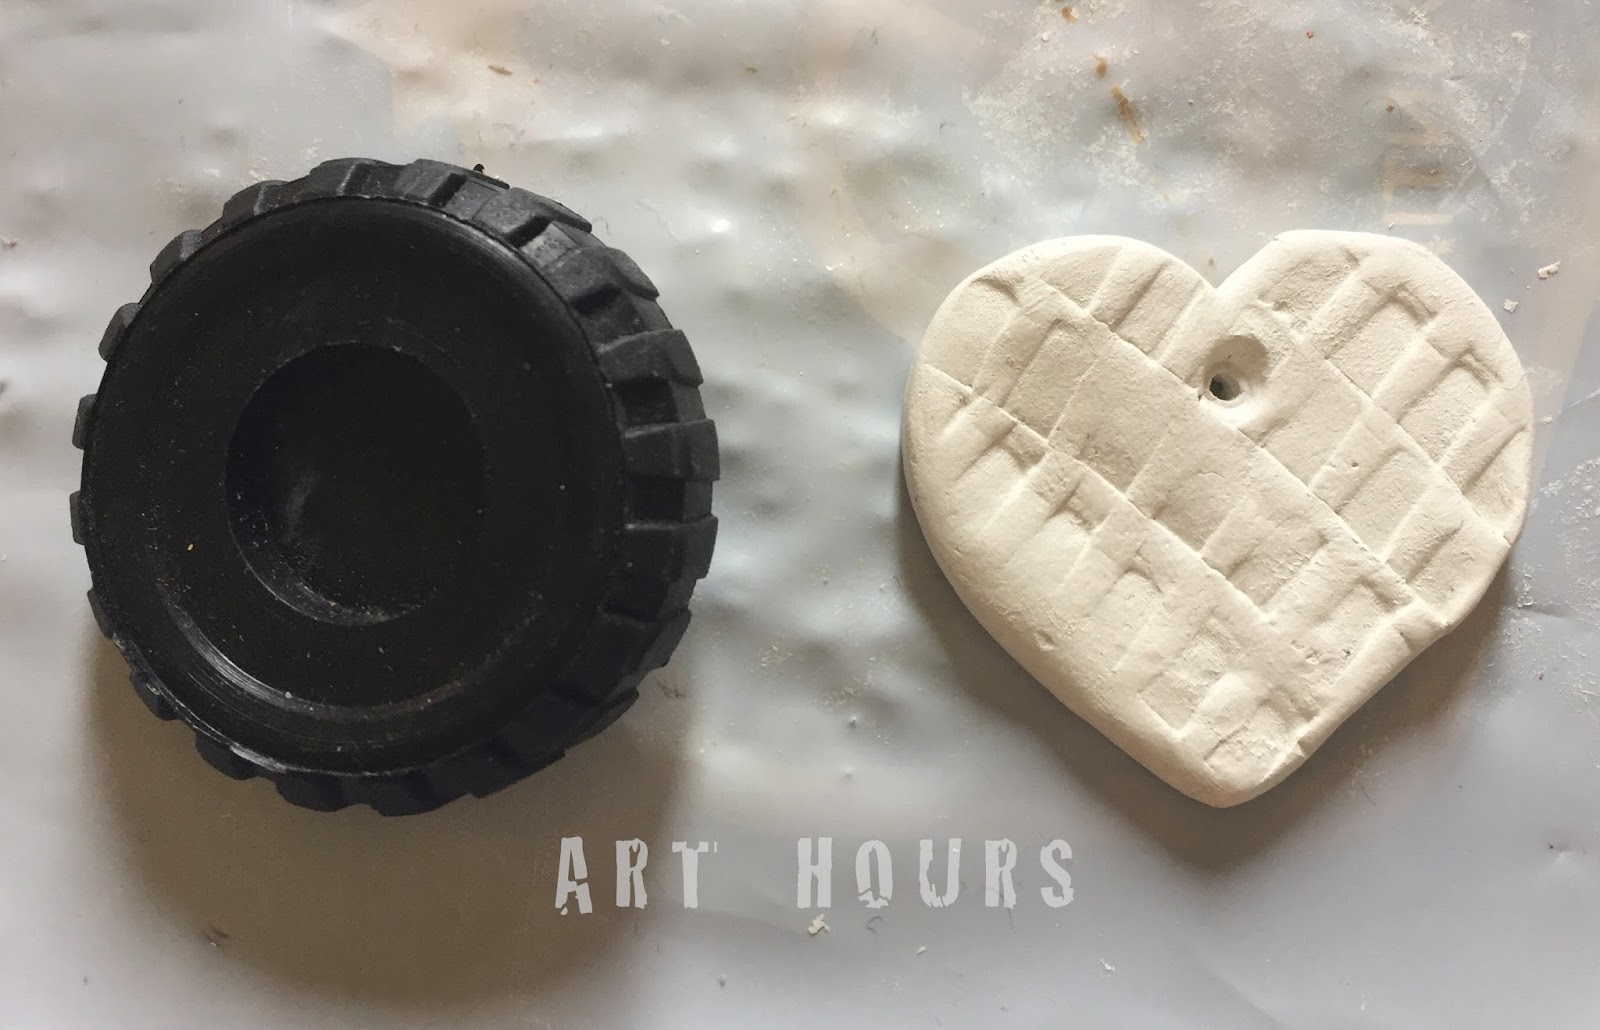
After cutting out different shapes of the trinkets we applied texture on to its surfaces using sketch pen caps, a toy wheel or just a toothpick. We also made sure that we make a hole in them using a toothpick to pass a string later. Till here, my kid handled the activity with great creativity and patience. It was fun to add textures using different toy tools she had. 
Art Hours Tutorial
Adding texture with a toy wheel

Step 03 - Curing or Drying the Clay Trinkets:
We left the clay trinkets to dry for more than a week. In the picture below you see the clay trinkets after it has been cured in the sun for more than a week now. Yes, it took more time to dry since it is winter here and we aren't getting much of the sun lately. The clay trinkets have turned out beautiful and the white color that it has achieved after drying makes it look more pretty. They are ready to be used and don't need any painting. You could just make them waterproof by applying a layer of mod podge and done.
Air Dry Clay Trinkets after they have been cured/dried

Step 04 - Painting the Clay Trinkets:
We added some colors to the trinkets since we wanted to gift them this valentine season and inevitably colors are a must for this activity. So our next step is painting and this is where I took over. All said and done, my kid was disappointed since she wasn't allowed to paint them. I promised her that she would be allowed to do so in the next class, I was thankfully spared this time!

I used poster colors and acrylic colors to paint these trinkets. This is how I started painting. I used a 0 number brush for the text or small areas which required detailing while for other areas I used a round or a flat brush as required.
Art Hours Tutorial
Painting the clay heart trinket

This is what the clay trinkets looked like after painting them with poster colors. For the brown heart in the right side, I used metallic bronze acrylic paint as the base color and then applied poster colors to the dots. Rest were all painted with poster colors only. I was rather happy with the white background and just primary colors for the details. 
Art Hours Tutorial
Clay Trinkets

Step 05 - Adding Strings or Ribbons
We did leave tiny holes in all the trinkets so that we could string them later. Don't forget to leave holes before you leave them to dry. Also, make sure the holes are big enough to pass a string or a ribbon. You can use a toothpick or a skewer stick or even a straw for that matter. Now to string them, you can use a fabric string, ribbons or any material that you wish to.

As you see below, this is how I ended up with the clay heart. It is ready to be used as a gift tag stringed with a ribbon. With lots of birthdays and anniversaries lined up this month, these clay trinkets are going to be very useful this season.
Clay Heart Gift Tag
So, finally, the mother-daughter duo did end up with something beautiful and useful - little clay trinkets to be used as lockets or charms or gift tags for gifting purpose. You can combine beads and buttons or add fancy ribbons...just use your imagination and be creative. 
Art Hours tutorial
Air Dry Clay Trinkets for the Valentine Season
Art Hours tutorial
Clay Trinkets combined with beads

Try out this activity with your kids. It will be fun indeed. Moreover, it is not too late and with Valentine's day just around the corner, this would be an activity both mother and child would enjoy. So start spreading love, for love begins at home!
---

1 Feb 2017

Welcoming Vasant Panchami


Welcoming Vasant Panchami with the popular stotra that we, as children, have learned and chanted on the day of Saraswati Puja - an auspicious day for all students.  

या कुन्देन्दुतुषारहारधवला या शुभ्रवस्त्रावृता
या वीणावरदण्डमण्डितकरा या श्वेतपद्मासना ।
या ब्रह्माच्युतशंकरप्रभृतिभिर्देवैः सदा पूजिता
सा मां पातु सरस्वति भगवती निःशेषजाड्यापहा ॥१॥
A sketch of the Goddess Saraswati and the Origami Lotus

While as kids we shunned away all the books as they would be laid at the feet of Goddess Saraswati, we kids would be delighted thinking that we don't have to study for the day. We began the day early with a quick bath and dressed in orange or yellow we would run quickly to the venue where Saraswati Puja would be held. Being a small township, we hoped to meet all our Bengali friends and relatives. We would carry a few important books - say Maths or Science to be laid at the feet of the Goddess of knowledge, believing that she would help us enhance our knowledge and understanding in that subject area atleast!  

The event of the day we most looked forward to was performing the Anjali rites with flowers and feeling blessed for the day, we kids would run around the puja pandal and enjoy the prasad thereafter. Those were the days when we considered the books as our enemy, and now when we wish to make friends with books they seem to desert us - call it the drawbacks of growing up!

Anyways, today I was fortunate enough to have some spare time to make a quick sketch of the Goddess Saraswati and to make an origami Lotus as a small offering from my side. An effort to keep the child in me alive and also my devotion towards the Goddess.
Origami Lotus
The origami lotus has been made using three paper sizes. Here, are the details about the same.
The leaf is made from 15 x 15 cm square origami paper.
The next yellow layer of petals is made from 17.5 x17.5 square cm origami paper.
The inner orange layer of petals is made from 15.0 x 15.0  cm square cm origami paper. 
The final lotus size with the leaf turned out to be around 5 cm.

It looks like a difficult model to start with but on the contrary, it turned out to be a very easy one to make. However, it requires a paper of very thin quality otherwise folding it at later stages makes it difficult. 
ORIGAMI LOTUS

May the Goddess of knowledge, arts, music, and science help us learn, gather and explore more knowledge and skills to us mortal beings. Let wisdom take control over our egos and may we always remain blessed by the Goddess Saraswati.

Happy Basant Panchami to all you.
---